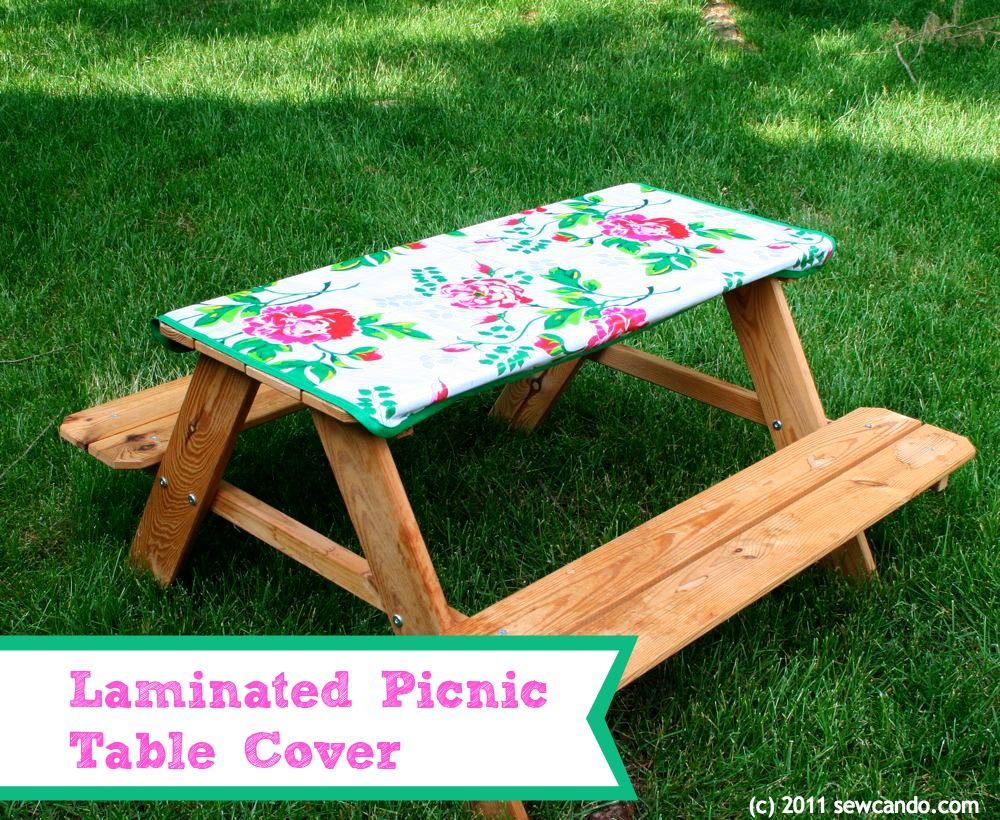
Eating outside should be fun & easy. However, cleaning food off a wooden picnic table is not. And the hokey prints of most vinyl tablecloths leave a stylish girl wanting more. Laminated cotton to the rescue!! Today's tutorial will show you how to make a custom table cover to fit any size table, with your own designer look and be sure not to blow off with a sudden gust of wind. Ok let's go!
You'll Need:
1-2yds of laminated cotton (depending on table size)
2-3 packages of double fold bias tape
Yard stick, marking pen, basic sewing notions
First measure your table length & width for size. Then measure the thickness (depth) of the tabletop and add + 2" that to your l x w dimensions. Now cut a rectangle from the laminated cotton in this size. I'm using a gorgeous print from the England Swings collection from Timeless Treasures (you can win some for yourself too - see below)
To round the corners of your rectangle by using a small bowl or glass & marking pen and then cut out the curve:
Cut four strips of bias tape that are double the table's width measurement in length, fold the raw edges inward and then sew each strip shut along the open side:
On the two longer sides of the rectangle, measure about 6 inches inward from each end and mark with pen. This will be where you will sew on your ties. Begin to insert the rectangle's raw edge into the bias tape that will be its trim.
When arriving at the marking points for the ties, insert one end of the tie under the bias tape on the wrong side and continue sewing. Repeat with the other 3 ties all the way around.
When you come to the end, cut the bias tape on an angle & allow for about an inch of overlap. Fold raw end inward and stitch in place.
When done, the cover should look like this on the underside:
Simply place on picnic table and tie in place underneath:
Now your stylish picnic table is look flirty & fun and is ready for whatever can be thrown at it /spilled on it!
Want a chance to win your very laminated cotton from this adorable collection? Click HERE to enter the giveaway!!

Sharing this creation with my FAVE LINK PARTIES too so click HERE to check them out!


Fantastic!!! Now can you make me one?? :P TFS!
ReplyDeleteVery cool idea! you could also make it a little bigger than the table and put elastic in it so you could just slip it on and off..great job!
ReplyDeleteYou make bias tape not seem so scary! I like the ties underneath, great idea. :)
ReplyDeleteApril - I tried the elastic idea in my first attempt - didn't lay as nice & flat - maybe with a round table it would work better.
ReplyDeleteShelly - I'm so glad. Bias tape can make sewing super easy - it just takes a little practice, but it's soooo helpful. I wouldn't be without it!!
This is a great idea!!!! And you can make different ones for holidays. I love, love.
ReplyDeleteladeedacreations.com
Where can I purchase one? I am going camping and would love one ASAP. ;-) how much? Please! Thanks!
ReplyDeleteTara@Trendy Treehouse
Makes it all so much prettier!
ReplyDeletelove it looks so old fashioned with an updated swing
ReplyDeleteLove this! What a great idea. You're absolutely right that cleaning stuff of a wooden picnic table is the pits.
ReplyDeleteI found your tute through the party at momnivore's dillema. I already happen to be a blog follower but would love a follow back if you're interested. :-) --> Carissa's Creativity Space
Good job, we painted our picnic table with gloss paint and it is great we just hose it off and nothing sticks to it. A friend of our did this, we got rid of our table and chairs and purchased a picnic table it is so nice and easy to clean.
ReplyDeleteLove simple projects that are this practical. Thanks so much for linking up!
ReplyDeleteGreat job! I love it. If my picnic table wasn't falling apart due to it rotting I would be right on this project! Thanks for linking up last week to Sew Woodsy! We hope you will join us again tomorrow! :)
ReplyDeleteThis is so strange... my husband was just telling me tonight that he saw a picnic table in someone's backyard with a tablecloth on it, and he thinks we need one now. Thanks to you, I'm on it!
ReplyDeleteLove this so much we are putting your project as one of the features for our weekly party tomorrow. Come by and grab a button!
ReplyDeleteI featured this as a great summer project on my blog today :)
ReplyDeletehttp://www.gwennypenny.com/2011/07/pin-it-wednesday-summer.html
What a fabulous idea, I am going to give this a go for sure!
ReplyDelete~Brandy
pamperedpettit.blogspot.com
Great Brandy! It's super easy and really helps with cleaning up too:)
Delete