Friday, May 31, 2013

Pretty Kitties Play Set: A Fun & Felt Tutorial


Today's project is one I'm especially excited about.  Using printed shapes cut from a fabric panel & a bit of stabilizer, it's easy to make beautiful, durable pieces to work with a felt board or mat.  And, I'm sharing my tutorial for making a companion play mat to make a complete set.


I fell in love with this Little Cat Korean canvas fabric panel over at Wholeport, one of my lovely sponsors, and knew it would be fabulous to work with - adorable cats, wearing retro clothes - what's not to love?  I was even more enraptured when it came.  The kitties were so cute and the accessories and outfits so incredibly detailed.  All those features gave me the idea for this project: Pretty Kitties Felt Play Set.  


I designed the felt mat as a little street scape, so the kids could have fun decorating with the furnishings & playing with their kitty-cat friends:


And to make things practical & easy to transport, the mat folds up, has handles and a handy outside pocket to store all the little figures and their goodies:


The kitties & all their accessories are backed with some extra firm stabilizer so they have a nicer weight and durability than plain felt, but they still grip onto the felt mat.


Supplies Needed:
- Fabric panel (Mine is Little Cat from Wholeport)
- 1/2 yd pink felt for mat
- Several sheets/scraps of cream, green, brown, blue felt for details
- 1 yd extra firm stabilizer
- 1/2 yd paper backed fusible web
- 1 yd 1/4 wide double fold bias tape
- 1 yd of jumbo ric rac
- 2 plastic snaps (Mine are from KAMsnaps.com)
- Sewing Notions (iron, press cloth, disappearing marker, pins, shears)

I ironed some paper backed fusible webbing to the backside of the panels and peeled off the paper when cool.  Then I fused some extra-firm stabilizer to the back of the pieces.


I stitched around each shape and cut them out: 


From this one panel I got a really nice assortment of pretty kitties, furniture, knick-knacks & treats:


Making The Play Mat:

From the main felt I cut:

(2) mat pieces 15 inches high by 25 inches wide
(2) straps 3 inches high by 11 inches wide
(1) pocket 8 inches high by 13 inches wide

From the roof pieces, I cut two trapezoids 4 inches high by 8.5 inches wide at the base (6 inches wide at top)


I cut two 7.5 inch squares for the houses and two green strips 1.5 inches high by 4.25 inches wide, cut into a fringe.  I pinned them onto the mat piece as shown:


To attach the houses and add a little detailing I encased the sides in the bias tape and then stitched them onto the background felt.


Then I stitched the rooftops on and basted the ric rac along the top & bottom edges.


To make the straps I folded them lengthwise and stitched them with a 1/8 inch allowance, turned them right side out & topstitched.  


I basted them into place on the sides, 5 inches in from either end:


I folded over the top of the pocket 1 inch and hemmed in place.  Then folded the sides and bottom under 1/2 inch and stitched the pocket onto the back piece for the mat, parallel to a short side.  


To keep the pocket closed when full I attached two plastic snaps to the pocket top and the mat piece.  I gave them extra strength by using scraps of the extra firm stabilizer underneath so the felt won't be stressed when pulled.


With right sides facing, I stitched around the entire mat with a 1/2 inch allowance, but left a hand-sized gap on one end for turning.


I cut two 11 inch by 12.5 inch pieces of the extra firm stabilizer, rolled and inserted the first into the far end of the mat, flattening into place.  Then I stitched it down the middle so it would stay in place and added the second to the remaining side.  Then I topstitched all the way around to close things up and the mat was ready for play.


My daughter gave it her seal of approval by saying "It's adorable!" and couldn't wait to start playing.  I can't wait to see what adventures they get up to together!


I'm also sharing this project with my FAVE LINK PARTIES.
Click HERE to check them out!


I was not financially compensated for this post.  I chose this fabric panel as an item to review.  The opinions are completely my own based on my experience.  I am an affiliate of Wholeport.com because I enjoy crafting with their products.  For my complete disclosure policy, click here. 

Sunday, May 26, 2013

Memorial Craftastic Monday Link Party & Southern Fabric Giveaway!!


Happy Memorial Day everyone!  I hope you're having a wonderful holiday weekend and are celebrating the brave people who made it possible.  Let's kick off the celebration with an extra special FABRIC giveaway from Southern Fabric!!
Find fabulous designer prints by the yard, charm pack, fat quarter & more at Southern Fabric. There's also a wide range of boutique patterns for clothing, toys, bags and other lovely sewn creations:  

Right now they are having big Memorial Day Sale of 20-30% off all yardage & pre-cuts and a special code: memorial10 to get an extra 10% off non-sale items. So it's a great time to stock up on some beautiful prints & new patterns.


AND, they are giving away a
$20 Southern Fabric gift certificate
to one lucky Sew Can Do reader!!

You could pick some really lovely fabrics like the new Happy Go Lucky collection by Bonnie and Camille:
Enter Here For Your Chance To Win!

a Rafflecopter giveaway


It's also time to announce the winner of the CafePress Gift Certificate Giveaway:

Congratulations Jeanine and a big thanks to CafePress for providing this fantastic prize!


Now let's see last week's Craftastic picks:

Glued To My Crafts shared this fun & less messy project for kids - clothespin painting!


As someone who's a big fan of "old-timey" style, I love this inner grandma dress from Sewing Like Mad:  


Check out this beautiful laundry room transformation by Life In The Lowcountry.  I really wish my washer & dryer had a room like this!


Shannon Sews showed this clever way to make a low-cut top more wearable:


If you're one of this week's features, be sure to grab my Featured On button over on the sidebar to let everyone know.  I also feature these projects & more party favorites on the Sew Can Do's Craftastic Picks board on PinterestFollow me there to see more great projects (and if yours is one of them)!   
  
Follow Me on Pinterest

Ready to link up your crafty creations?
 
Party rules are simple:
  • As long as it's crafty, and made by you, it's Craftastic (no links to giveaways, shops, link parties or other people's work).  Add the link to your specific post (not the main page of your blog).
  • Grab my party button & put it on your post or blog somewhere.  The code's on the sidebar -> 
  • Check out some of the other fabulous links and share some crafty comment love.  We all love getting comments!!


Friday, May 24, 2013

Start Sewing for Summer with Seamingly Smitten Patterns!


Sunny days are here and we've got an extended weekend!  That means there's extra time to sew up some warm weather wearables.  Why not make it easy with some fast & fun patterns from Seamingly Smitten?

These are the patterns for people who want to sew, but don't want to feel frustrated or spend loads of time muddling through confusing directions or overdone details.  


These patterns give us busy sewing lovers what we need: 

- PDF format to quickly print & start sewing
- Easy-to-follow directions
- Loads of step-by-step photos
- Simple assembly. No complicated notions or techniques to slow you down!

Check out these fun looks you could make!

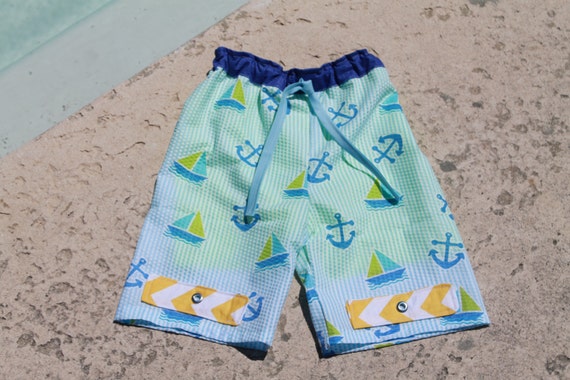
Get ready for summer with this stylish Boys Swim Trunk Pattern.  It's got all the details: mesh lining, elastic waist, contrasting waistband, faux drawstring and grommet detailing on the optional tabs to help your guys from 3 months to 12 yrs look cool at the pool.  My favorite part is how you can use traditional fabrics like seersucker & cotton, as well swimsuit knits for this style.


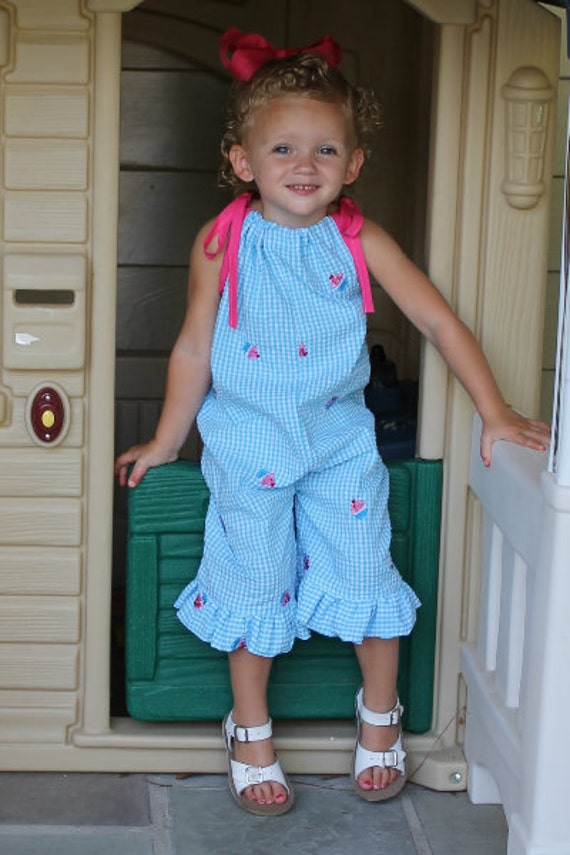
For the little ladies, the Rory Bubble Romper Pattern is the perfect look for summer. I've made this before, and it is a super quick sew & so comfy for running around.  It's also got a ruffle hem option for two cute looks:


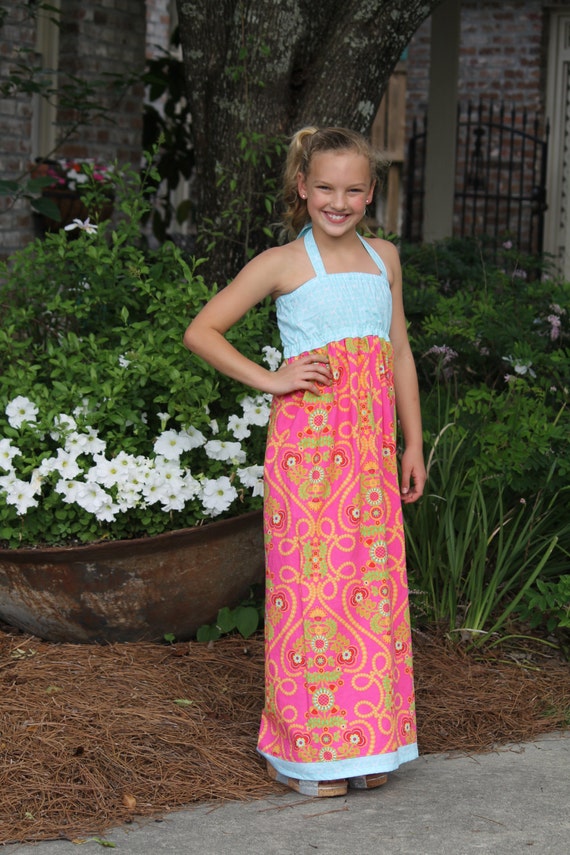
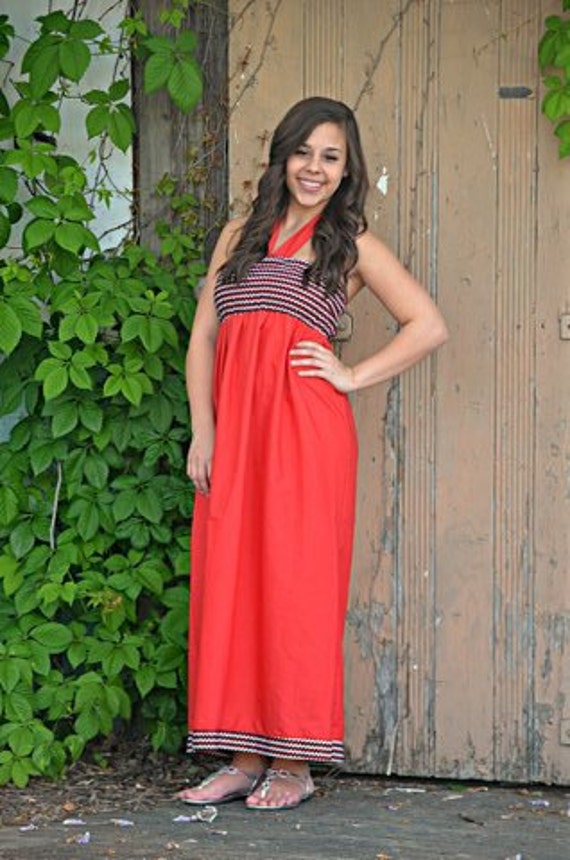
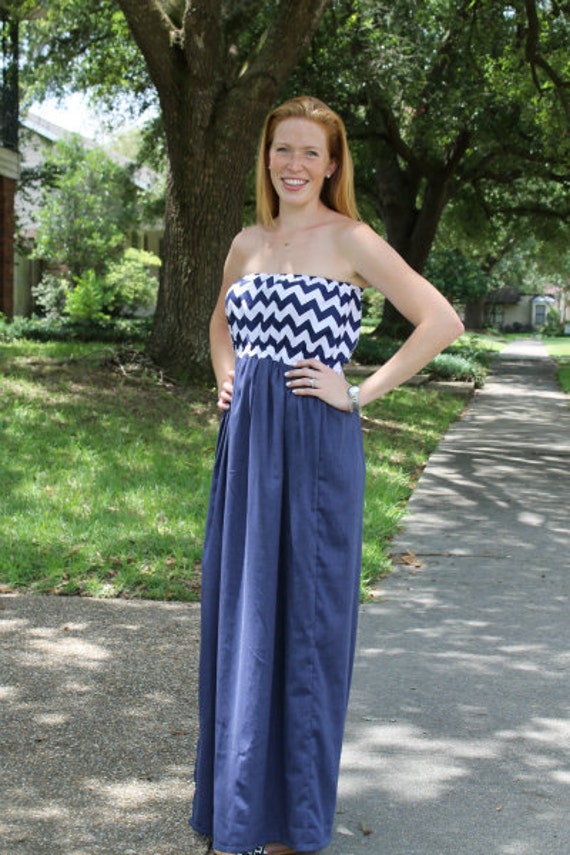
The Tween/Teen Maxi Dress Pattern is ideal for the older girls.  It offers sizing for 8-16 yrs and FOUR different strap options, so there are sweet looks for the younger ones: 


Plus more sophisticated options for the teens:


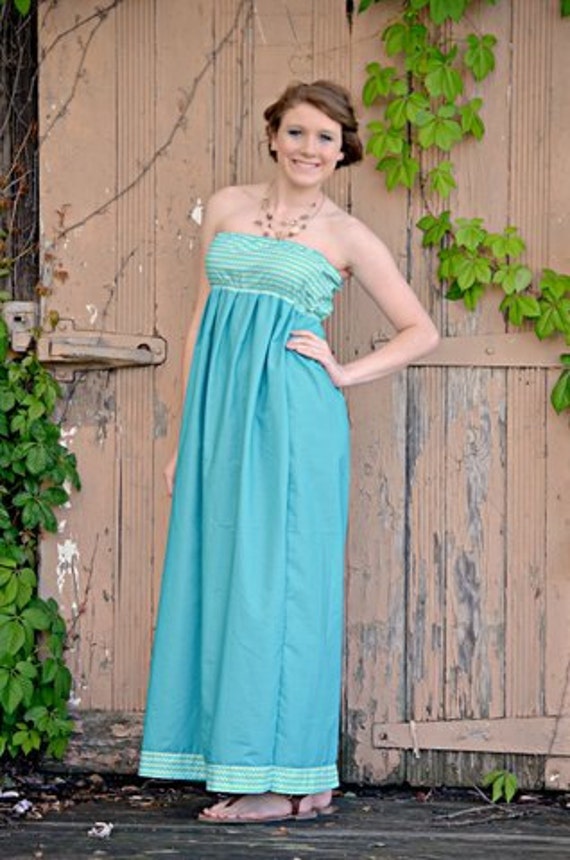
And there's the Mimi Maxi Dress Pattern, so the ladies can also enjoy the maxi sundress style in sizes ranging from 0-18 (and including maternity!):


Head over to Seamingly Smitten's blog to sign up for the newsletter that's just started this month - it has a special coupon just for subscribers!  It's a great way to find out more & get a little discount so you can get your summer sewing fix on this Memorial Day weekend:)


I received payment for this post. The opinions are completely my own, based on my honest experience with the items referenced, some of which I have purchased myself or reviewed previously.

Thursday, May 23, 2013

Making A Waldorf Style Doll: A Review of Adirondack Patterns


A few weeks ago I shared some info on one of my newest sponsors, Adirondack Patterns and Handmade Babies.  Today I'm going to show my results with using one of their pattern sets and share how the process went. 


I'd never made a doll with a sculpted head or sewn on hair before, so this was a new experience for me.  I'm not a sewing novice, but I am self-taught with making toys, so I was curious to see what this would teach me.

I tried out their Large Waldorf Doll Discount Package. This included a pattern to make the body, face, dress and two ways to do the hair (crochet and non-crochet): 


I'd always wanted to make a Waldorf Doll, since buying them can be pretty expensive - most large ones like this can cost over $100!  Using this pattern bundle and some basic materials is a lot more affordable and there's the added bonus of picking your own skin tone, hair color, etc. to make it look exactly how you want.

The doll pattern & instructions made it quick to put the doll body together.  There were some handy tips for stitching & cutting to make things flow well.  I liked that the body is jointed so the doll will sit and had some nice details like the shaped ankles:


I was a little nervous before I started the head sculpting, but this was broken into simple steps, with really clear photos of each step so it went surprisingly fast.  The tricks to sculpt the face were really clever.  The nose, cheeks, head got nice definition as a result. 


I don't crochet, so I used the non-crochet hair method.  Again, the method used to attach the hair was one of those "Ohhhh, that's so much better than I'd have done it" techniques and can be styled into ponytails or with barrettes or hairbands.


The dress was super quick to make & I could see making slight modifications to it to make a bunch of outfits for the doll.  I especially like that the style has an elastic neck opening so my 3 yr old can dress & undress her without getting frustrated.


Since this was my first attempt, I went the cheap route and used materials I had on hand. So instead of a fancier organic interlock cotton, wool roving and wool yarn, I used a premium soft peach anti-pill fleece, cluster fiberfill and acrylic yarn.  On my next one I plan to upgrade to the nicer materials to make a more high end version, but I was really pleased with the end result of this one. Now the next one will be even better!  

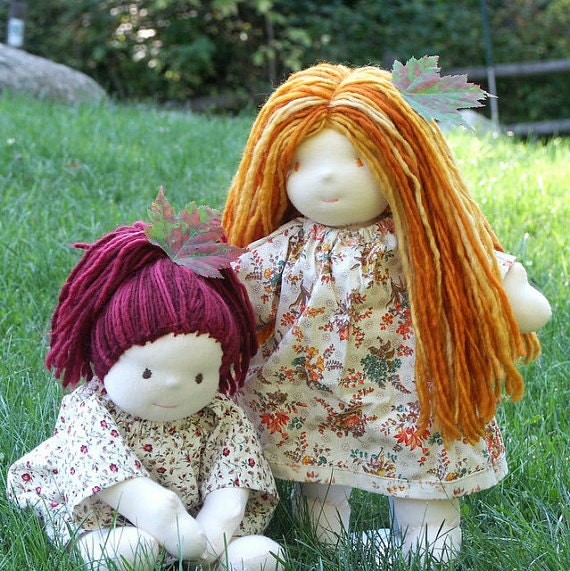
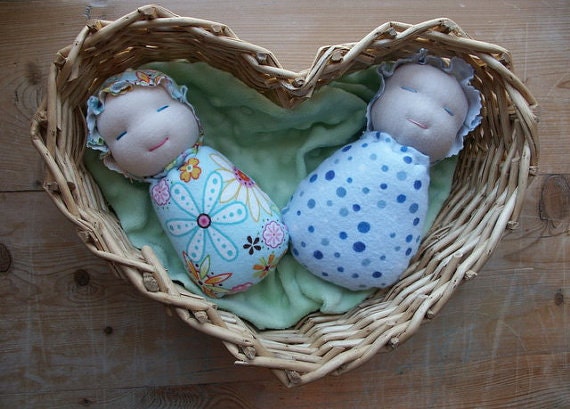
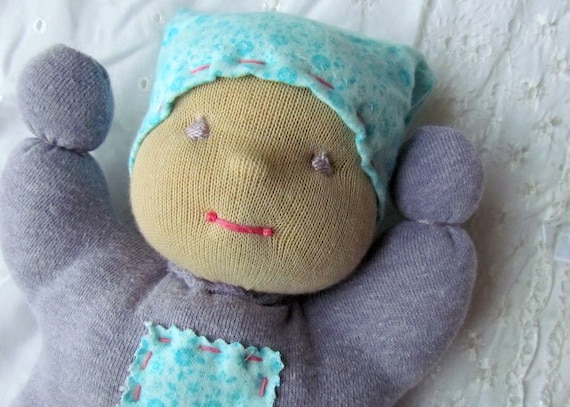
Adirondack Patterns and Handmade Babies sells patterns for several Waldorf style dolls besides this one. I really like these styles too:


They also have patterns for knit & crochet wearables, cloth diapers, children's accessories and offer completed Waldorf Inspired Dolls for those who don't sew.  I'd definitely use their patterns again and look forward to making more lovely dolls with them:)


I was not financially compensated for this post. I received a free pattern to review and use with materials I purchased myself. The opinions are completely my own, based on my experience.

LinkWithin

Related Posts with Thumbnails