Sunday, February 23, 2020

Craftastic Monday Link Party


It's a new Craftastic Monday Link Party!  
Time to link up your latest & greatest crafts and projects.


~~~~~~~~~~~~~~~~~~
Last week I shared my Ultra Easy Baby Headbands:


And now for this week's Craftastic Picks:

Chas' Crazy Creations did this incredible inexpensive laundry room makeover in one day and for just $40:


Coastal Bohemian created some beautiful paper feather embellishments:


Kiku Corner shared this black chocolate bundt cake recipe:

Black Chocolate Bundt Cake

Julie's Creative Lifestyle shared these sweet crochet four leaf clovers and the free pattern for making them:


crochet 4 leaf clover @ Julie's Creative Lifestyle

Quilting Patchwork did this adorable paper pieced forest and fox quilt:


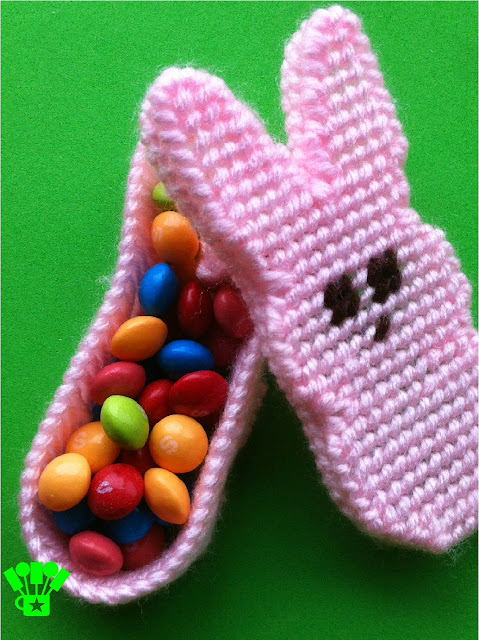
DIY Party Mom did this Easter Peeps bunny box:

Plastic Canvas Easter Peeps Bunny Box Pattern by Kandy Kreations

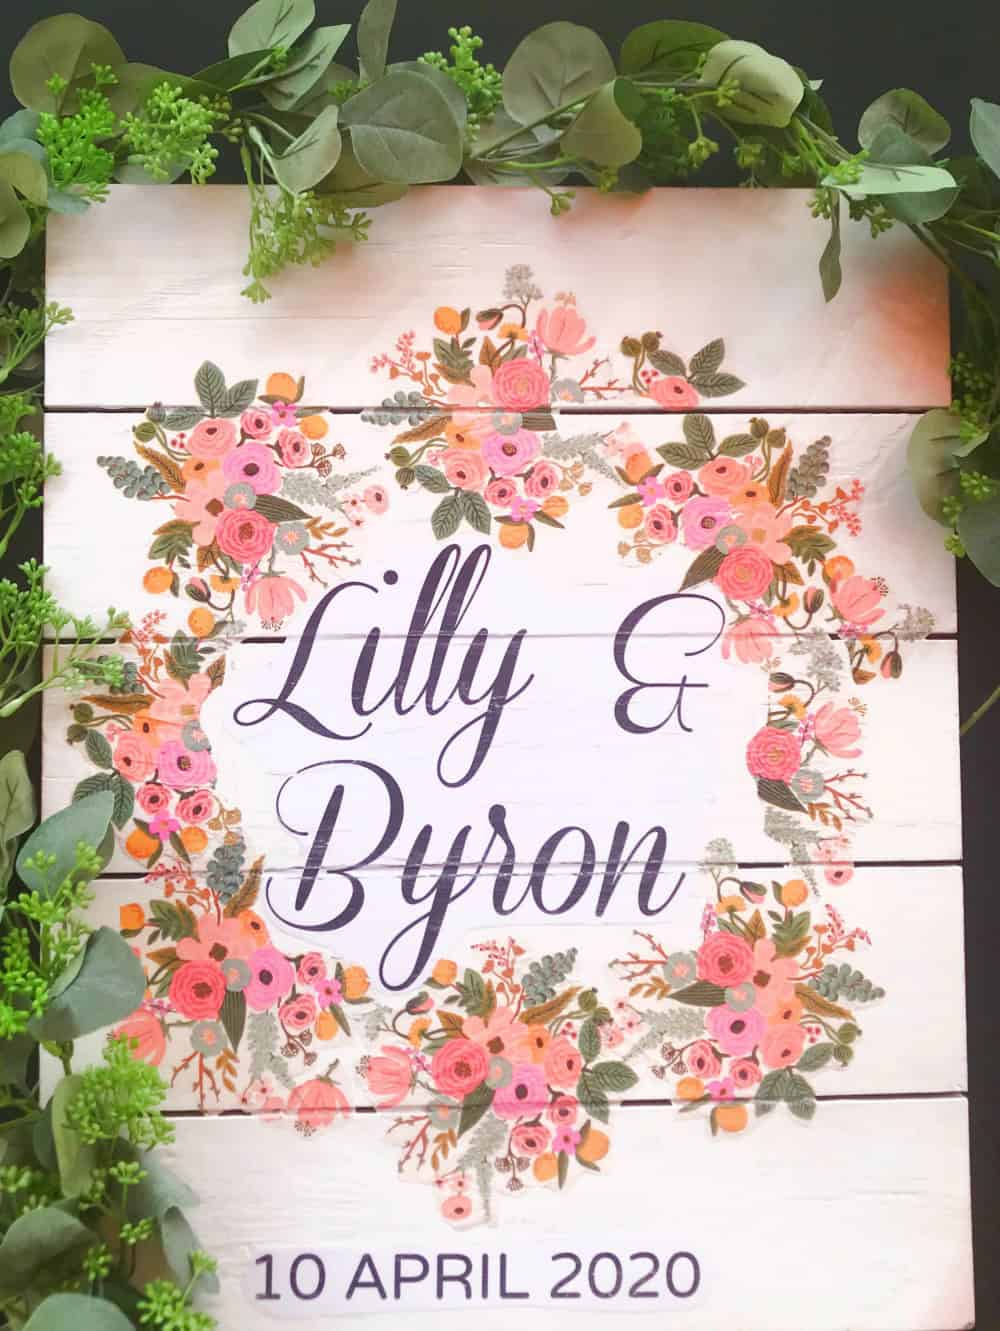
My French Twist made this beautiful spring DIY wedding sign:


If you're one of this week's features, be sure to grab my Featured On button over on my Buttons Page to share the good news. 

 
Want a Chance to 
Be Featured Next Week?  

Link back to the party somewhere on your blog.
I can't feature your post if you don't share the party.  
  
Featured projects are also shared on Sew Can Do's Twitter feed for your creations to have MORE exposure!


Follow me there to see more great projects (and see if yours is one of them)!   

Ready to link up your crafty creations?
 
Party rules are simple: 
  • As long as it's crafty, and made by you, it's Craftastic (no links to other people's work or to shops - join my Crafty Business Weekends Link Party instead!).  
  • Add the link to your specific post. Product reviews, plagiarized or sponsored posts for random items will be immediately deleted.  
  • Grab my party button & put it on your post, party page or blog somewhere.  If you want the chance to be featured, this is key.  The button code can be found HERE.
  • Check out some of the other fabulous links and share some crafty comment love.  We all love getting comments!!


You are invited to the Inlinkz link party!
Click here to enter

Wednesday, February 19, 2020

Adorable Ultra Easy Baby Headbands


Today's project is so easy it, it practically makes itself.  It's just what a busy mom (or grandma, aunt or friend) needs when free time is short, but you want a DIY with big impact:  Adorable Ultra Easy Baby Headbands!  


These are really quick to make & turn out super cute!  They stay on well and are very soft.  They are fabulous to give as gifts or to use for new baby photo shoots:


Supply-wise, you can be as simple or detailed as you want with the decorative elements.  Using soft items is key though.  I used some cute satin roses and fabric covered buttons in my stash from previous trips to my local craft stores.  Smaller 1/2 - 3/4 in diameter is ideal size.  

Materials:
- Nylon baby headband or pair of girl's tights*
- Small fabric or crochet flowers, bows or fabric covered buttons
- Hot glue gun


* It's literally two steps to make these - one step if you use pre-made headbands.  I got mine online from a hair bow supply store that had lots of colors, but after I got them I realized you could easily make them super cheap.  
Here's how:

Take a pair of girl's nylon tights and cut the legs into 1 inch wide tubes.  One pair will make a TON of headbands & should stretch well enough to fit newborn - toddler.  After cutting, give them a little pull so the edges curl and you've got the perfect, soft & simple baby headband!


To attach the embellishments, just add a dab of hot glue to the back of the items and firmly press onto the headband.  If putting several items next to one another, make sure they're really close so there won't be gaps when it gets a little stretched while being worn.


 I did trios of embellishments for mine.  It took just minutes to make several.  Literally anyone could craft some up!  

Just a reminder, for safety purposes, these should only be worn while closely supervised - never when left alone or in bed.  


I LOVE how sweet they look on my littlest lady.  They're so quick & inexpensive that you could make some to match every outfit or occasion.  It's the ideal craft equation of minimal make time x maximum enjoyment of results. 


Sunday, February 16, 2020

Craftastic Monday Link Party Time!


I hope everyone had a love-filled Valentine's Day weekend.  It was our new baby's first holiday & we're still adjusting to our busier, more kids, less sleep/free time life so holiday crafting was last on my mind this year.  It's been great seeing all the clever creations you've been making as I recover, so let's see more at this week's Craftastic Monday Link Party!  


~~~~~~~~~~~~~~~~~~
Last week I shared this easy make Noah's Ark Soft Toy Set (from a fabric panel):


And now for this week's Craftastic Picks:

Simply Beautiful by Angela created this super clever DIY range hood cover with built-in storage:


Trick n' Treat shared this banana pumpkin muffin recipe:

Pumpkin Banana Muffin Recipe @ treatntrick.blogspot.com
The Purple Poncho had this sweet free pattern for crochet heart coasters:


Our Clover House made these charming, & surprisingly easy, heart shaped mini layer cakes:

If you're one of this week's features, be sure to grab my Featured On button over on my Buttons Page to share the good news. 

 
Want a Chance to 
Be Featured Next Week?  

Link back to the party somewhere on your blog.
I can't feature your post if you don't share the party.  
  
Featured projects are also shared on Sew Can Do's Twitter feed for your creations to have MORE exposure!


Follow me there to see more great projects (and see if yours is one of them)!   

Ready to link up your crafty creations?
 
Party rules are simple: 
  • As long as it's crafty, and made by you, it's Craftastic (no links to other people's work or to shops - join my Crafty Business Weekends Link Party instead!).  
  • Add the link to your specific post. Product reviews, plagiarized or sponsored posts for random items will be immediately deleted.  
  • Grab my party button & put it on your post, party page or blog somewhere.  If you want the chance to be featured, this is key.  The button code can be found HERE.
  • Check out some of the other fabulous links and share some crafty comment love.  We all love getting comments!!


You are invited to the Inlinkz link party!
Click here to enter

Wednesday, February 12, 2020

Plush Noah's Ark Toy Set from a Fabric Panel


Between homeschooling my 3 big kids, chasing after an almost 2yr old, a baby about to arrive + running my fabric shop, the past couple months were really short on crafting time.  I still wanted to do some handmade gifts at Christmas, so I used this Noah's Ark Soft Toy Set fabric panel, which I carry in my shop, to make a fun play set for my small guy.  

I loved how it came with a Noah figure & a nice assortment of animals & the directions are printed right on the panel so you just cut, sew and stuff.  Sew easy!


  It's also nice that the finished ark has pockets on both sides for a place to store all the figures and make play more fun.  


It seemed like the perfect handmade Christmas gift for my not quite two year old - especially as I didn't have the energy to do anything time consuming or complicated. 


 Despite sewing for 10+yrs, this was the first time I'd ever sewn a plush toy from a panel.  I wanted to see just how easy it would be to put together.

Cutting out all the pieces is straightforward.  I didn't prewash it since I didn't want things to shrink.  It can be hand or delicate machine washed when done.  The seam allowance is included in the pieces.  The next step is hemming the ark pocket pieces by folding, pressing and then stitching the top edges to the wrong side:


These get basted to the ark side pieces along the sides & bottom.  There are markings to make matching them up easy:


Then the top edges of the ark sides are pinned & stitched together, starting & stopping where the pocket edges are:


The bottom gusset piece gets added there to give the dimension for the ark:


There are markings at the bottom to show where to leave a gap for turning:


All the seam allowances should get trimmed down and clipped near the curves.  I find using pinking shears makes this easy to do in one step:


After turning right side out, it's time to stuff with polyfill.  It's key to stuff with small amounts at a time and really pushing into the curves and corners to give it a good shape.  


The figures are easy to do - stitching right along their printed designs gives a nice smooth finish when turned right side out & are stuffed just like the ark:


The gaps get pinned & slip stitched closed by hand:


It was pretty quick to make and it turned out just as expected.  It's easy enough for a beginner, which is a real plus.  I used some of my Multi Sky Cloud fabric & some blue velour to make a fun playscape back drop too:


Sew cute & easy to make too!

Sunday, February 9, 2020

Link Love: Craftastic Monday Link Party


It's a love-filled Craftastic Monday Link Party!  Now's the ideal time to share all the love & Valentine's Day creations you've made - past or present - as well as any new DIYs, recipes, sewing, quilting, crafts, crochet or decor you've done.  


~~~~~~~~~~~~~~~~~~
Last week I shared my latest creation, 8 1/2 months in the making, Sew Can Do Baby #5 - a new little girl:


In the coming weeks I'll be sharing some of the new crafty things I've made for my special girl.

And now for this week's Craftastic Picks:

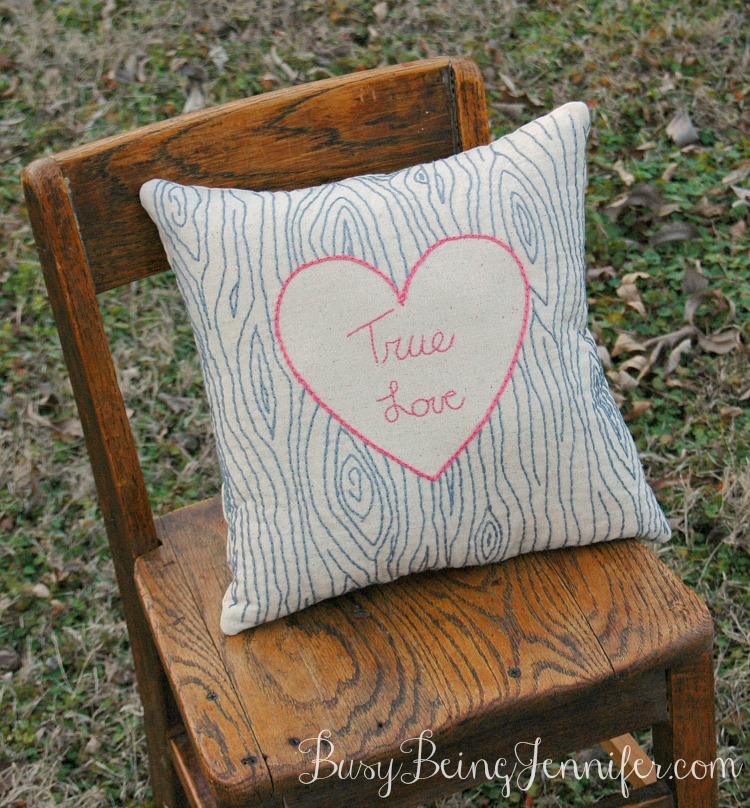
Busy Being Jennifer did this incredible hand stitched true love pillow:

The process of the hand stitched true love pillow - busybeingjennifer.com

DIY Vibes shared this festive DIY Valentine's Day sign:

sewing trim pink heart on door

Annemarie's Haakblog crocheted this incredible plush dragon and is giving away a kit to make one too:


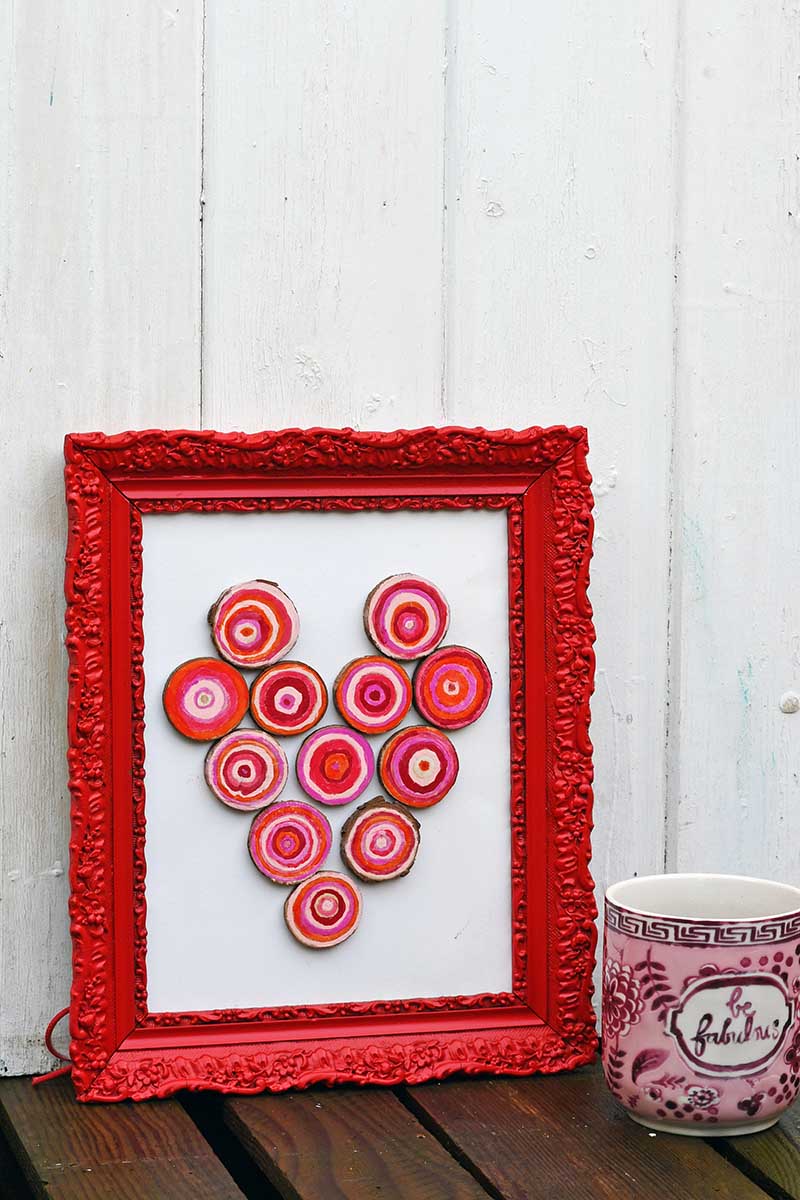
Pillar Box Blue made this rustic heart wood slice decoration:

rustic heart for Valentine's day
If you're one of this week's features, be sure to grab my Featured On button over on my Buttons Page to share the good news. 

 
Want a Chance to 
Be Featured Next Week?  

Link back to the party somewhere on your blog.
I can't feature your post if you don't share the party.  
  
Featured projects are also shared on Sew Can Do's Twitter feed for your creations to have MORE exposure!


Follow me there to see more great projects (and see if yours is one of them)!   

Ready to link up your crafty creations?
 
Party rules are simple: 
  • As long as it's crafty, and made by you, it's Craftastic (no links to other people's work or to shops - join my Crafty Business Weekends Link Party instead!).  
  • Add the link to your specific post. Product reviews, plagiarized or sponsored posts for random items will be immediately deleted.  
  • Grab my party button & put it on your post, party page or blog somewhere.  If you want the chance to be featured, this is key.  The button code can be found HERE.
  • Check out some of the other fabulous links and share some crafty comment love.  We all love getting comments!!


You are invited to the Inlinkz link party!
Click here to enter

Sunday, February 2, 2020

February Love + New Baby Craftastic Monday Link Party


It's the first Craftastic Monday Link Party of February!  I know the party is a bit late, but I have a good reason:

 Sew Can Do baby #5 arrived nearly 2 weeks early so we just came home from the hospital with our new little one a few hours ago.

We're pretty tired after a hectic few days, so this week I'll be taking it easy and getting used to our new, bigger than before, family.  I can't wait to see what beautiful creations you've made as I recuperate.  It's the ideal time to share all the love, Valentine's Day and baby-themed makes you've done - past or present - as well as any new DIYs, recipes, sewing, quilting, crafts, crochet or decor you've done.  


~~~~~~~~~~~~~~~~~~
Last week I shared my latest crafty project this 
Easy Hand Knit Round Pouf Pillow:


And now for this week's Craftastic Picks:

She's Crafty Crafty showed how to make fun faux vintage decorative cans:


Apple Street Cottage shared these festive Valentine's Day coasters:


B4 and Afters had a free pattern for these pretty crochet earrings:


pink earrings hanging from a vase https://www.b4andafters.com/easy-crocheted-earrings/

Zeleni Trenutki made this beautiful knit sweater:


If you're one of this week's features, be sure to grab my Featured On button over on my Buttons Page to share the good news. 

 
Want a Chance to 
Be Featured Next Week?  

Link back to the party somewhere on your blog.
I can't feature your post if you don't share the party.  
  
Featured projects are also shared on Sew Can Do's Twitter feed for your creations to have MORE exposure!


Follow me there to see more great projects (and see if yours is one of them)!   

Ready to link up your crafty creations?
 
Party rules are simple: 
  • As long as it's crafty, and made by you, it's Craftastic (no links to other people's work or to shops - join my Crafty Business Weekends Link Party instead!).  
  • Add the link to your specific post. Product reviews, plagiarized or sponsored posts for random items will be immediately deleted.  
  • Grab my party button & put it on your post, party page or blog somewhere.  If you want the chance to be featured, this is key.  The button code can be found HERE.
  • Check out some of the other fabulous links and share some crafty comment love.  We all love getting comments!!


You are invited to the Inlinkz link party!
Click here to enter

LinkWithin

Related Posts with Thumbnails