Sunday, February 28, 2021

Craftastic Monday Link Party


 Can you believe March is already here?  With more warmth & sun, spring doesn't feel far away and boy is it welcome!! Time to show all those wonderful spring, St. Patrick's Day & Easter projects and whatever else you've been working on.  Let's see what craftastic things you've been creating.  If it's made by you, link it up!!


~~~~~~~~~~~~~~~~~~~ 
Here are this week's Craftastic Picks:
 
The Organized Dream showed how to make these charming rustic DIY twine carrots:

 
Frau Tschi-Tschi shared how to make these adorable lamb egg warmers.


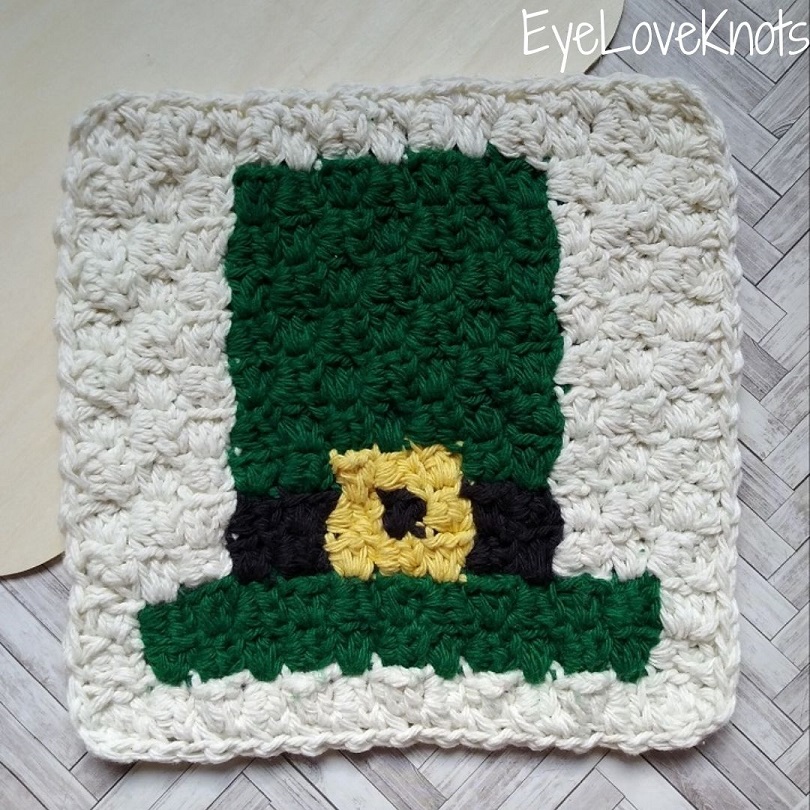
EyeLove Knots gave us this fun leprechuan hat crochet washcloth pattern:

 
Artsy Karma turned old wine corks into these cute decorative ornaments:
 

Haekelfieber shared her pattern for making this cute crochet winter fairy:
  

Satsuma Design gave this great how-to for making your own reusable tea bags:
 
How to easily make reusable fabric tea bags. Try this easy sewing project to make loads of tea bags for a delicious cup of tea! #reusableteabag #sustainable #teatime #easysewing
 
If you're one of this week's features, be sure to grab my Featured On button over on my Buttons Page to share the good news. 

 Want a Chance to 

Be Featured Next Week?  

Link back to the party somewhere on your blog.

I can't feature your post if you don't share the party.

  
Ready to link up your crafty creations?
 
Party rules are simple: 
  • As long as it's crafty, and made by you, it's Craftastic (no links to other people's work or to businesses/shops).  
  • Add the link to your specific post. Product reviews, plagiarized or sponsored posts for random items will be immediately deleted.  
  • Grab my party button & put it on your post, party page or blog somewhere.  If you want the chance to be featured, this is key.  The button code can be found HERE.
  • Check out some of the other fabulous links and share some crafty comment love.  We all love getting comments!!


You are invited to the Inlinkz link party!

Click here to enter

Wednesday, February 24, 2021

Being A Sewing Maniac aka 11th Hour Baby Dress Pattern Hack

 
Today's sewing project proved that I am a sewing maniac.  As if you didn't already know!  There have been a number of things over the years, fabric hoarding, getting insanely excited about sewing gear notions & patterns and well, this blog, that all pointed in that direction....but this latest one confirmed it for me.  My littlest one's first birthday outfit:
 

A sweet little dirndl-style knit dress covered in cute colorful ponies and coordinating French terry leggings.
 
 
I got the brainstorm to do it the day before her family party.  I realized she didn't have a little dress she could crawl around in for the big day.  The few winter dresses she wore at Christmas are a bit longer so they get caught on her knees and impair her mobility.  This one is just the right length to keep her moving:


So there I was, cake & food were all set, house was decently tidy, present wrapped and I had NOTHING planned for her to wear less than 24hrs later.  
 
So I did what a sewing maniac does - I quickly found old fabrics in my stash that serendipitously went together, spent 10 minutes sifting through my patterns to find something that could work with her size and my amounts of fabric, decided I'd have to modify one's style a bit and then sewed everything up (while homeschooling two big kids, wrestling with two small ones throughout the day).  No birthday stress for the first time EVER so why not tack a potentially massive stress inducing last minute sewing project on?!?  Crazy lady behavior, that's what it is.   
 

I used Ottobre Design's Muksis Top/Dress pattern (issue 1/2009) and their Lola Leggings pattern (issue 3/2009).  I'd used both years before, but never paired together.  Here's one of the Muksis tops I'd made over 10 years ago, for my oldest daughter.  My littlest lady also wore this outfit, but got too small a few months ago.


I really like the pattern's fit, but for this one I wanted more to the dress than just an A-line shape.  So I decided to turn it into a build-on-it bodice by cutting across the pattern two inches below the armscye and straightening the sides (since they normal flare).  I cut a skirt section that was a few inches more than double the bodice width and made it 11 inches long.
 
 
The top has a lap shoulder design so I followed the pattern directions to attach the neck bindings and overlapped the shoulders. 
 
 
The French terry I was using for the leggins was very stretchy and lightweight so it was ideal as my binding & cuff fabric. Especially since the very reason this adorable pony print was still in my stash after a number of years was that I'd been dreading to sew with it.  It was an interlock knit from JoAnn's which means fairly cheap in price and quality.  Even though the fabric weight is good, it sometimes stretches when you don't want it to, thread gets caught, binding can be tricky to stitch, etc.  I've been sewing with knits for a LONG time and have tried almost every trick and have concluded their knit is just okay, so you have to expect it to give you a hard time.
 

After I attached the sleeves and sewed the sides it was time for the skirt portion.
 

I sewed up the side seams and then did my easy technique for gathering along the top:


Along the top raw edge I basted a wide zigzag stitch, capturing some thin crochet yarn between the stitches.  I always do a separate piece for the front & the back sides so there are two raw ends at each seam. 

 
Then it's super easy to pull those ends and create gathers that are easy to even out and adjust. Then all that was left was to pin the skirt to the bodice, stitch them together and do the skirt hem.  The Lola leggings were really simple since each leg was a single piece - just stitched up the inside leg seams, crotch seam, waistband and leg hems & done!


And by some miracle everything turned out exactly right, which almost never happens (especially when rushing to hit an insane deadline).  
 

I just love how it turned out and she's already worn in several times.  I line dry these sorts of outfits to keep them from shrinking or piling too.  Which works well since the cuffs turn down and the loose fit mean the dress can be worn a long time - even as a tunic top a year from now.  Maybe that means I've got next year's birthday outfit covered already....;)


Sunday, February 21, 2021

Craftastic Monday Link Party


Happy Monday!  It's a brand new week and so many good things are coming up - a new spring season, St. Patrick's Day, Easter....let's see what wonderful things you've got for us in those themes or whatever other reasons you've been getting crafty.  Recipes, stuff for kids, paper crafts, decor, DIY, sewing, knitting/crochet, gift making, etc.  
If it's made by you, link it up!!

 
~~~~~~~~~~~~~~~~~~~ 
Here are this week's Craftastic Picks:
 
Love My Little Cottage showed how to this charming blessed spring wreath:

 
Sum of Their Stories gave this great how-to for making a top entirely from fabric scraps:
 

Simple Joys shared this easy sandwich cake cookie recipe with just 5 ingredients for the cookie AND the yummy frosting filling:
  

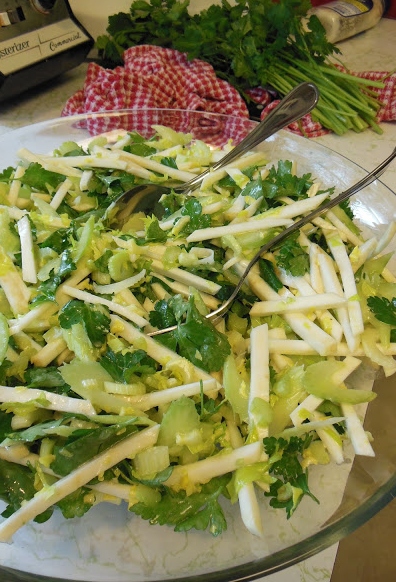
Scratch Made Food made this tasty recipe for celery root and stem salad with lemon horseradish vinaigrette:
 
Root and Stem Salad, a delicious crunchy celery and celery root salad!
 
If you're one of this week's features, be sure to grab my Featured On button over on my Buttons Page to share the good news. 

 Want a Chance to 

Be Featured Next Week?  

Link back to the party somewhere on your blog.

I can't feature your post if you don't share the party.

  
Ready to link up your crafty creations?
 
Party rules are simple: 
  • As long as it's crafty, and made by you, it's Craftastic (no links to other people's work or to businesses/shops).  
  • Add the link to your specific post. Product reviews, plagiarized or sponsored posts for random items will be immediately deleted.  
  • Grab my party button & put it on your post, party page or blog somewhere.  If you want the chance to be featured, this is key.  The button code can be found HERE.
  • Check out some of the other fabulous links and share some crafty comment love.  We all love getting comments!!


You are invited to the Inlinkz link party!

Click here to enter

Sunday, February 14, 2021

Feel The Love Craftastic Monday Link Party


Happy Valentine's Day!  It's the ideal time to link those Valentine's & love-themed projects, but it also kicks off the St. Patrick's Day, Easter & spring season of crafts too, since those occasions are coming up fast.  We want to see your recipes, paper crafts, decor, DIY, sewing, knitting/crochet and anything else too.  If it's made by you - link it up!!

 
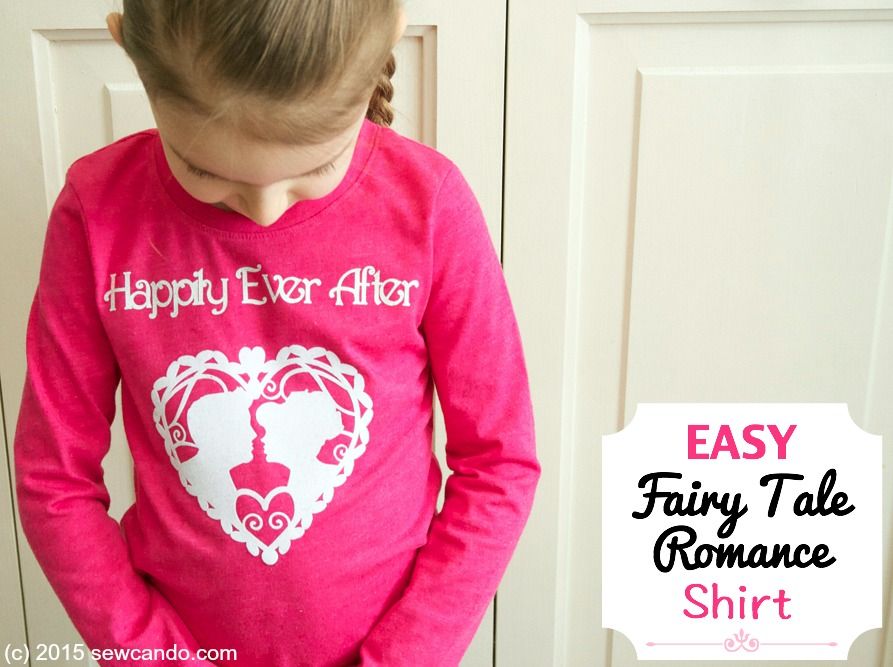
Last week I shared a quick & still-fun-after-the-holiday project: my Easy Valentine's Day Heat Transfer Shirts: 
 
 
~~~~~~~~~~~~~~~~~~~ 
Here are this week's Craftastic Picks:
 
The House On Silverado showed how to make this farmhouse style coffee cup stand:


The Apple Street Cottage shared this sweet decoupaged heart box (and some great technique tips):
  

Made on Maidstone made this sweet triple heart wreath:
 

Frau Tschi-Tschi shared her free crochet pattern for this adorable plush sewing machine:

 
If you're one of this week's features, be sure to grab my Featured On button over on my Buttons Page to share the good news. 

 Want a Chance to 

Be Featured Next Week?  

Link back to the party somewhere on your blog.

I can't feature your post if you don't share the party.

  
Ready to link up your crafty creations?
 
Party rules are simple: 
  • As long as it's crafty, and made by you, it's Craftastic (no links to other people's work or to businesses/shops).  
  • Add the link to your specific post. Product reviews, plagiarized or sponsored posts for random items will be immediately deleted.  
  • Grab my party button & put it on your post, party page or blog somewhere.  If you want the chance to be featured, this is key.  The button code can be found HERE.
  • Check out some of the other fabulous links and share some crafty comment love.  We all love getting comments!!


You are invited to the Inlinkz link party!

Click here to enter

Wednesday, February 10, 2021

Easy Love My Mom Valentine's Day Heat Transfer Shirts


Need a last minute idea for Valentine's Day?  How about this cute little heat transfer to make a holiday shirt or bag?  I've got you covered with this holiday heat transfer project.  It even shows Mom some extra ❤️:


I literally just dreamed it up and made it yesterday, so that's why it's pretty simple.  Sometimes projects need to be quick & easy so you can enjoy the actual occasion rather than be caught up in the project making part.  It occurred to me around mid-day that this Valentine's Day will be the first one for my little nephew. I wanted to send him a little something to celebrate that, but  obviously it being just days away I needed to hurry.  And use what I happened to have on hand in the house.  No challenges, right?  LOL.  That's how I tend to roll....

Thankfully I had some sheets of red heat transfer vinyl left from some previous Christmas projects and a blank 18 month sized t-shirt I never got around to embellishing for my almost 3yr old (luckily said nephew is big for his age).  Added bonus was that I found I had a blank 2T long sleeved tee in my stash too and my little guy is on the small side, so I was able to make one for him too!


 These worked out ideally.  I'm a big fan of "holiday" themed wearables that you can still wear well after the actual day is over and these definitely tick that box too.  YAY!!!

 Now, how to make them

Materials:
- Heat transfer vinyl
- Shirt, bag or other fabric item (unwashed)
- Cutting machine (I used my 6yr old Cricut Explore)
- Cricut Easy Press or Iron
- My FREE Mom Heart design below
 

 Here's my FREE design for the I Love Mom Heart.  Just right click to save the jpeg.  You could use it as a graphic or printable too;)


Using Cricut Design Space I turned my design into a cut file (making cut lines around the Mom part as well as the outer edges) and sized it to fit baby/toddler sized shirts (about 4 inches high by 6.5 inches wide).  Then mirrored it before cutting:


 It took just seconds to cut them both out:


Weeding out just the Mom part - remembering to leave the center of the "O":


Press time!!  It's key to check the fabric composition to make sure you get the settings right.  And don't wash the shirts first - having that factory sizing in them helps htv adhere better.  These were both cotton poly blends and this was basic htv, so the Cricut Heat Guide recommended 330 degrees.  I always press mine on a folded fluffy towel too - I didn't get good results using the special heat press mat in the past.


I wanted my design to be centered, but you could get creative with placement or angling.  The shirts got a 5 second preheat with the press and then I put the heat transfer vinyl on.  FYI, if you're new to using htv, you leave the carrier sheet on.


30 seconds on the front, 15 seconds on the back and then wait until cool to peel the carrier sheet off.  One of them wasn't fully adhered around one of the letter edges so I gave it another 15 second on the front and 5 more on the back.  Just don't go too long when re-pressing or it'll melt the htv. 


Wait 24hrs before washing and always wash on cold, delicate and line dry to keep the transfer nice.  I've had some shirts like this last for years and dozens of washes by doing all that, so it's worth it.  I can't wait to see my nephew and my little guy wearing these.  He's my sister's first baby, so it makes it extra special that it's Mom-themed.


I've also got these other fun shirt Valentine's Day tutorials using Heat Transfer Vinyl:


and this sweet Love Bug Applique too:

Happy Valentine's Day!


LinkWithin

Related Posts with Thumbnails